
Table of Contents
- Why Choose Secure Wired Cameras for Your Property
- Essential Preparations for Your Secure Wired Camera Installation
- Clarifying Your Home Security Objectives
- Assessing Wired Versus Wireless Camera Security
- Determining Optimal Camera Positions for Full Coverage
- Selecting the Appropriate Wired Camera Models and Features
Why Choose Secure Wired Cameras for Your Property
Secure wired cameras provide a dependable foundation for property security, delivering consistent power and stable transmission that wireless alternatives can’t always guarantee. Unlike battery-powered options, these hardwired systems eliminate the hassle of frequent battery changes and minimize signal dropouts, ensuring continuous monitoring of your premises. Hardwired cameras also reduce maintenance demands because they draw power directly from the building, eliminating the need to climb ladders to swap batteries or troubleshoot connectivity.
As a trusted partner since 1986, we at Alula by Alarm21 understand the importance of reliable surveillance for both commercial and residential properties. Our team offers same-day purchase and setup for immediate coverage, and we provide DIY-friendly systems in a box for those who prefer a self-installed solution with professional guidance. For dependable protection backed by decades of experience, CALL US TODAY. We’ll help you assess your property’s needs before moving into the essential preparation steps for deployment.
Essential Preparations for Your Secure Wired Camera Installation
Once you’ve decided to invest in a wired camera system, careful preparation ensures a smooth installation. Start by planning camera placement to cover main entry points—front and back doors, ground-floor windows, and the garage—while avoiding blind spots.
Confirm your router has available Ethernet ports or invest in a PoE switch to power and connect each camera over a single cable. Common cable types include Cat5e or Cat6; we can help you choose the right one. Measure distances between each camera location and the router to ensure cable runs stay within the camera’s maximum length. If a run exceeds that limit, consider a network switch.
Check wall and ceiling surfaces for solid mounting points, drillable material, and a path to run cabling discreetly. Ensure each location can support the camera’s weight and allow secure attachment.
Then, decide between self-installation using our guided tutorials and 5-step wizard, or professional installation (same-day availability may vary). Our support team is available during business hours—Monday–Friday 9am–6pm, Saturday–Sunday 10am–6pm—to help with equipment selection and cable planning.
These preparations will help you refine your security goals, so you can choose the right configuration and monitoring features.
Clarifying Your Home Security Objectives
Before comparing camera types, it’s critical to clarify exactly what you want your system to accomplish. We help homeowners in Southern California define priorities like deterring intruders, capturing clear video evidence, and receiving instant mobile alerts. Your goals will shape every decision from camera placement to monitoring style.
- What are your top security concerns—deterrence, detailed evidence, or real-time alerts?
- Do you prefer the peace of mind that comes with 24/7 professional monitoring and fast emergency response capabilities we offer, or will self-monitoring suffice?
- Which indoor and outdoor areas need coverage? Consider entry points, garages, backyards, and main living spaces.
- Is remote access through your smartphone a must-have for arming, disarming, and checking live feeds while away?
With your objectives defined, you can now weigh the trade-offs between wired and wireless systems to find the best fit for your priorities.
Assessing Wired Versus Wireless Camera Security
After clarifying your home security objectives, the next step is assessing wired versus wireless camera technology.
Wired cameras connect directly via cable, eliminating RF attack surfaces and reducing remote hacking risks. Their signals are typically encrypted end-to-end, and physical tampering requires access to the cable or recorder.
When evaluating secure wired cameras for your home, we examine the absence of over-the-air transmission as a security advantage. Wireless cameras rely on Wi-Fi, which introduces potential vulnerabilities such as signal interception, jamming, and interference. Most wireless cameras use strong encryption, but security depends on Wi-Fi network strength and firmware updates.

This choice affects where you can position cameras for full coverage.
Determining Optimal Camera Positions for Full Coverage
Once you’ve chosen wired cameras for their reliable performance, strategic placement is essential to eliminate coverage gaps. We recommend three core steps to determine optimal positions:
- Identify critical coverage zones: entry doors, ground-floor windows, high-traffic interior areas, and blind spots such as side yards, garages, and loading docks.
- Evaluate sightlines and obstructions: walk the property to spot walls, landscaping, and signage that could block a camera’s view; match each camera’s field of view to the area’s dimensions.
- Set mounting height and angle: install cameras 8–10 feet high, angled slightly downward to capture faces and activity while avoiding glare from exterior lights. In Los Angeles, consider the sun’s path to prevent washed-out footage.
These steps help ensure every vulnerable area gets the attention it needs. With optimal positions mapped out, you can focus on choosing wired security camera models—resolution, night vision, and weatherproofing—that suit each location’s unique requirements.
Selecting the Appropriate Wired Camera Models and Features
When selecting secure wired cameras for a commercial property, focus on matching type and features to each job.
Bullet cameras monitor long outdoor distances, such as a loading dock or perimeter. Dome cameras serve indoor halls and entryways with a discreet, vandal-resistant design. PTZ cameras pan, tilt, and zoom across large areas like parking lots.
Because they rely on a physical power source, wired cameras deliver uninterrupted power and a stable video feed—key for commercial surveillance.
Resolution (4MP or higher) captures fine details like faces or license plates. Night vision range ensures after-hours visibility. Weatherproof ratings such as IP66 handle rain and dust. Local NVR or cloud storage affects video retention and remote access.
Once you’ve selected the right models, the next phase is ensuring reliable power and network connectivity. For personalized camera recommendations, our security experts at Alula by Alarm21 are available for a consultation.
Powering and Connecting Your Wired Camera System
Once you have selected the right camera models, the next step is delivering power and establishing a reliable connection to your recording equipment. Power over Ethernet, commonly called PoE, sends both data and electricity through a single network cable, simplifying cable runs and reducing the number of components at each camera location. Traditional setups use separate power adapters plugged into nearby outlets, which requires running two cables — one for video transmission and one for power.
Cameras connect to a network video recorder through standard Ethernet cabling over a local network switch, while analog systems use coaxial cable runs back to a digital video recorder. Regardless of the method, every camera needs a consistent power supply and a dedicated pathway to the recorder. Using structured cabling like Cat5e or Cat6 ensures clean signal transmission and helps avoid interference that can degrade video quality. Planning these power and connectivity requirements early makes the physical installation process more straightforward.
Executing a Flawless Wired Camera Installation
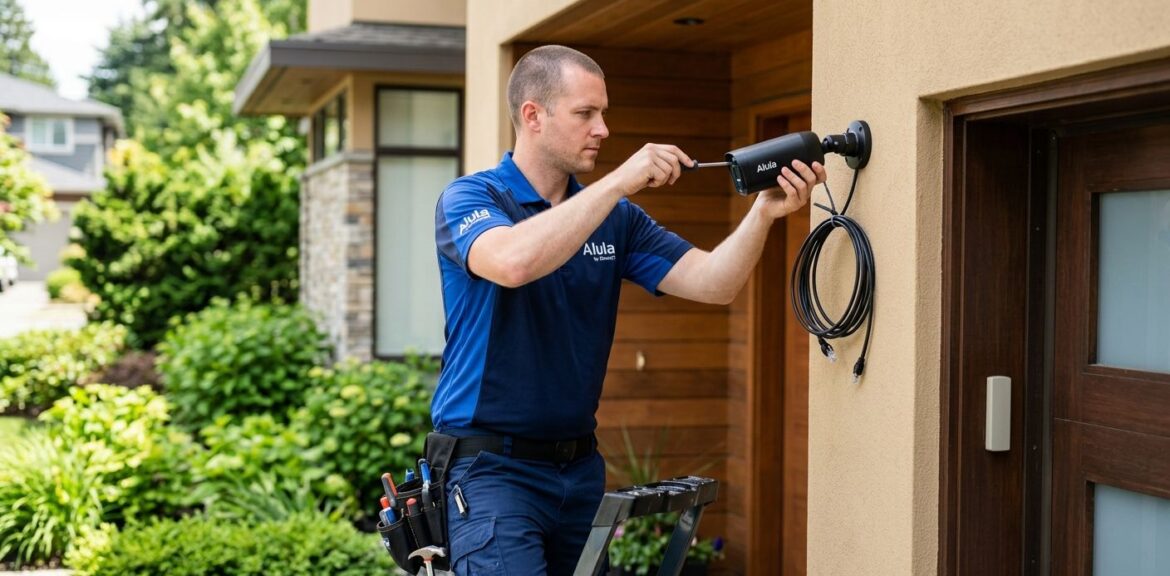
With power and data connections in place, the physical camera installation begins. Select a mounting location that provides clear coverage and remains accessible. For outdoor cameras, sealing cable entry points is crucial; we advise applying silicone sealant or weatherproof grommets around every opening to prevent moisture ingress and preserve weather resistance.
Attach the bracket, adjust the camera angle to capture the desired view, and tighten all hardware securely. Proper torque ensures the camera stays in place without over-tightening. Neatly conceal excess cable along the mounting surface with clips or conduit. Before sealing the final cable path, verify the camera feed to confirm a solid connection, allowing adjustments without rework. With the camera mounted and connections protected, the installation is ready for integration with your monitoring system. A final image-quality check and connectivity test ensures a clean, secure setup that can be linked to automation and professional monitoring services.
Integrating Monitoring and Smart Home Automation
Once your secure wired cameras are installed, the next step is to unify them with professional monitoring and smart home automation.
Our 24/7 professional monitoring center receives real-time alerts from your wired cameras when motion or unusual activity is detected. If an alarm is triggered, trained operators can assess the situation and dispatch emergency responders to your property when needed, ensuring a rapid, coordinated response. Through the Prima app, we can view live camera feeds and receive mobile notifications.
The Prima app lets us integrate compatible smart locks and thermostats so we can lock doors or adjust the temperature from the same interface. We can set the thermostat to an energy-saving mode when we arm the system and schedule doors to lock automatically each night. Centralized control makes the security panel a home command center.
Together, these integrations deliver convenience, energy savings, and greater peace of mind. Proper integration supports reliable, around-the-clock protection, though occasional hiccups can occur.
Troubleshooting Common Wired Camera Issues
After integrating your wired security cameras with professional monitoring and home automation, minor technical glitches can still surface. The most common frustrations—no power, intermittent connectivity, and poor image quality—have straightforward remedies you can apply before seeking assistance.
- No power: Make sure the power adapter is firmly plugged into the camera and a working outlet. Inspect the entire cable for cuts, kinks, or wear. If the camera has a power LED, confirm it lights up; if not, test the outlet with another device to rule out a tripped breaker or switched outlet.
- Intermittent connectivity or no video feed: Restart both the camera and your internet router—many dropouts clear after a fresh power cycle. For Ethernet-connected cameras, reseat the connector at both ends and check for bent pins or corrosion. Confirm the camera shows as online in your recorder or app; a full power-cycle of the recorder may be needed if it still doesn’t appear.
- Poor image quality: Start by gently cleaning the lens with a dry microfiber cloth to remove dust, smudges, or spider webs. If your model has a manual focus ring, adjust it while watching the live view to sharpen the picture. Next, verify the resolution setting in your recorder or app matches the camera’s rated resolution—a mismatch can produce blurry, pixelated video.
Most of these checks restore normal operation quickly. Should any issue persist, our maintenance and support team is ready to provide deeper assistance. Keeping your system in peak condition not only safeguards your property but also lets you unlock the full potential of every integrated feature.
Maximizing the Value of Your Wired Security Camera Investment
By addressing common wired camera challenges, you ensure your system runs optimally. Wired cameras offer reliable, uninterrupted power and a stable connection, eliminating the interference that can plague wireless setups. Our same-day purchase and setup availability, paired with a guided 5-step wizard, means you can have a professional-grade system up and running quickly. With 24/7 professional monitoring and ongoing support, you gain peace of mind that your property is protected.
Investing in a professionally installed wired system delivers long-term value through dependable performance and expert assistance, making secure wired cameras a smart investment. Contact us today to learn more about the Prima system and how our team can tailor a solution for your needs. The brand’s products are sold and serviced by independent professional security dealers and monitoring companies throughout North America. Napco Prima™ is a trademark of NAPCO Security Technologies, Inc. Copyright 2023 © All right Reserved.
Start Your Wired Camera Installation
Now that you’ve learned how to select, install, and integrate a wired security camera system, the next step is to put that knowledge into action. With the Prima All-in-One panel’s 5-step setup wizard and guided on-screen tutorials, installation is straightforward for any homeowner. Our same-day purchase and setup availability means you can start protecting your property without delay. Choose the flexibility of a DIY installation with phone-based specialist support or let our experienced technicians handle the entire process. The system integrates seamlessly with smart home devices and includes 24/7 professional monitoring for peace of mind. Review compatible wired cameras and get started today. Your journey to a fully secured home begins now.